It was PitchKnives’ 4th of July challenge, but that was nothing new to me.
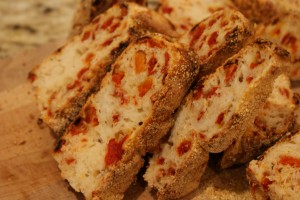
Two summers ago, my wife and I threw a 4th of July party and asked everyone to bring some food to share. Most people brought the usual stuff — pasta salad, guacamole, beer — but one friend arrived with a loaf of homemade “Red, White, and Blue” bread, which looked as though it had just been lifted from the display window of a European bakery. It was delicious, filled with chopped sundried tomatoes and topped with slabs of 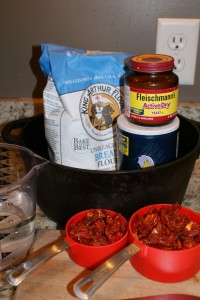 Zingerman’s blue cheese.
 Zingerman’s blue cheese.
I assumed she’d spent hours in her kitchen, kneading the thing herself, put she told me confidentially that she’d only put a half an hour of work into the process. The secret? Jim Lahey’s “My Bread: The Revolutionary No-Work, No-Knead Method,” a cookbook that allows you to bypass the difficult parts of the bread-making process. All you need is time (for the bread to complete its slow rise) and a cast iron pot.
To be specific, you’ll also need the following:
3 cups unbleached bread flour
1 and 3/4th cup water
3/4th cup teaspoon active dry yeast (Fleischmann’s is a good brand)
1 teaspoon salt
1 1/2 cup chopped sundried tomatoes (you can use olives, too, in which case you’ll probably want to omit the salt)
We purchased Jim Lahey’s cookbook a few weeks later and started making our own loaves. This past week, we attempted to celebrate July 4th by recreating our friend’s red, white, and blue variety, but we couldn’t manage to find blue cheese at the last minute on a holiday afternoon. Instead, we topped each slice with olive tapenade and brought the whole thing to a pool party, where it was devoured within 15 minutes by a crowd of drunk Nashville musicians. Success!
Here’s how you do it:
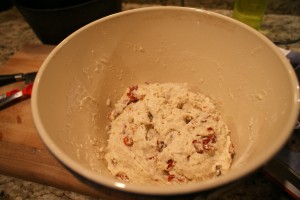 Combine all the dry ingredients — flour, yeast, salt, and tomatoes — in a bowl. Add the water and mix for thirty seconds, using a wooden spoon or your hands. Once it’s sticky and moist, cover the bowl with some plastic wrap and set the bowl aside. You’ll need to store it for twelve to eighteen hours, out of sunlight. We usually put ours on top of the microwave.
Twelve to eighteen hours later, the bread will be bigger — roughly twice its original size — and you should see some bubbles along the top. This means fermentation has started to take place. Get a clean dish towel or napkin and coat it a little flour or cornmeal, or a combination of the two. Using your wooden spoon, scoop the dough off the sides of the 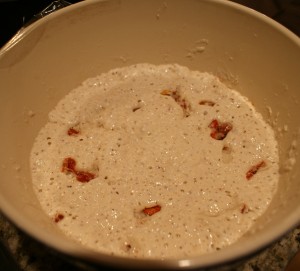 bowl and shape it into a ball, then drop the ball onto the towel. Sprinkle some additional cornmeal or flour over the dough to prevent sticking, and then wrap the rest of the towel around the dough and place it in a warm, draft-free spot. We use the inside of the microwave. Let it rise again for one to two hours.
 bowl and shape it into a ball, then drop the ball onto the towel. Sprinkle some additional cornmeal or flour over the dough to prevent sticking, and then wrap the rest of the towel around the dough and place it in a warm, draft-free spot. We use the inside of the microwave. Let it rise again for one to two hours.
Half an hour before the end of the second rise, place a covered cast iron pot into the lower third of the oven at 475 degrees. Let it heat up for thirty minutes, then take it out and dump the bread inside. Don’t burn yourself, because a 475-degree cast iron pot leaves a nasty scar. Use a wooden spoon to scrap away any dough that may be clinging to the sides of the pot, cover the pot once again, and bake for thirty minutes. After the initial thirty minutes are up, take off the lid and bake for an additional 15-30 minutes. This last part 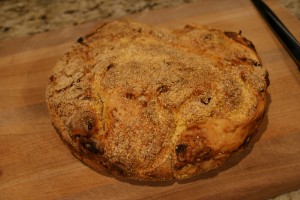 depends on the power of your oven… ours has the approximate strength of a nuclear reactor, so we limit the uncovered baking to 15 minutes (for a total of 45 minutes) and our bread comes out looking perfect.
 depends on the power of your oven… ours has the approximate strength of a nuclear reactor, so we limit the uncovered baking to 15 minutes (for a total of 45 minutes) and our bread comes out looking perfect.
Take the pot out of the oven, immediately remove the bread (this can be awkward — use tongs or a set of wooden spoons), and allow to cool for a full hour before you cut into it. For maximum patriotic effect, serve the bread with some high-quality blue cheese (not pictured here, sadly) and consume while listening to Bruce Springsteen.


Pingback: Red State, Blue State, Red Bread, Blue Bread | PitchKnives and Butter Forks